Casablanca Fan Flywheel Replacement: A Step-by-Step Guide
The flywheel is a crucial component in many Casablanca ceiling fans, playing a role in ensuring smooth and stable rotation. While Casablanca fans are known for their durability, the flywheel can, in some cases, require replacement due to wear or damage. If you’re considering tackling this repair, this guide provides detailed, step-by-step instructions to help you through the process.
This article is designed to be a practical resource for those with some DIY experience who are comfortable working with tools and basic mechanical systems. We’ll outline the necessary precautions, tools, and procedures to help you safely and effectively replace a Casablanca fan’s flywheel. It is important to know what you are doing before you start any work.
While this repair is achievable for some, safety is always paramount. We will emphasize the importance of disconnecting power and taking other precautions throughout this guide. Our goal is to provide clear and accurate information to help you determine if this is a repair you can undertake yourself.
Understanding the Casablanca Fan Flywheel
To effectively replace a flywheel, it’s helpful to understand its role in your Casablanca fan.
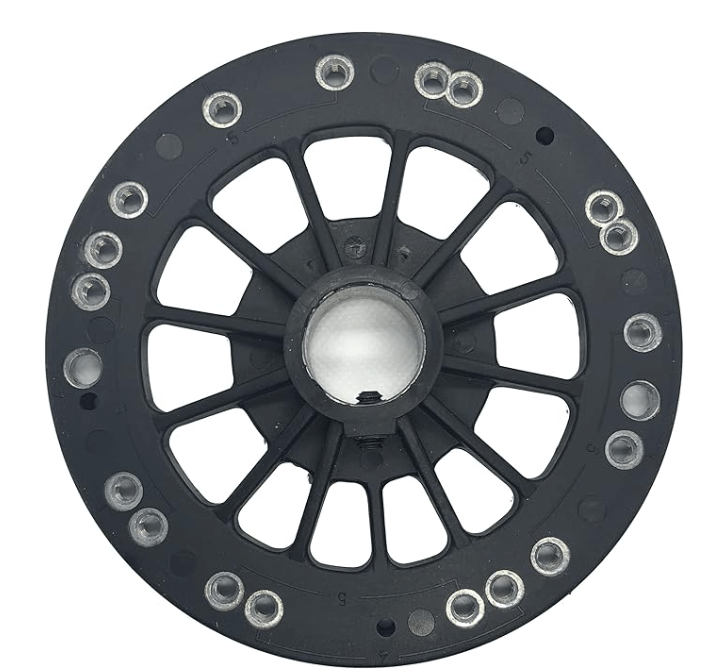
- Purpose: The flywheel is a weighted component that’s attached to the fan’s motor shaft. Its primary function is to provide inertia, which helps the fan rotate smoothly and consistently. Think of it like a spinning top it helps maintain balance and momentum.
- Location: The flywheel is typically located directly above the fan’s motor, often at the point where the fan’s downrod connects.
- Types/Designs: While the basic function remains the same, Casablanca fans may use flywheels of slightly different sizes, weights, or designs. The specific design can vary depending on the fan model and its age.
- Reasons for Replacement: Flywheels may need replacement due to:
- Damage: Cracks or bends in the flywheel can cause imbalance and noise.
- Wear: Over a very long time, though less common, wear can affect the flywheel’s performance.
- Dislodgement: In some cases, the flywheel may become loose or dislodged from the motor shaft.
Understanding these basics will help you appreciate the importance of proper flywheel replacement.
Safety Precautions and Tools
Replacing a Casablanca fan’s flywheel involves some basic mechanical work and interaction with electrical components. Prioritizing safety is essential. Here’s a breakdown of the necessary precautions and tools:
- Safety First:
- Turn Off Power: The most crucial step is to turn off the power to the ceiling fan at the circuit breaker. This eliminates the risk of electric shock.
- Verify Power Off: Use a voltage tester to double check that the power is indeed off before you begin working on the fan.
- Safety Glasses: Wear safety glasses to protect your eyes from any falling debris or small parts.
- Gloves (Optional): Work gloves can protect your hands from sharp edges or rough surfaces.
- Tools and Materials:
- Screwdrivers: You will likely need a set of screwdrivers, both Phillips head and flat head, in various sizes.
- Wrenches: Wrenches may be necessary to loosen and tighten bolts or nuts. The sizes will vary depending on your fan model.
- Pliers: Pliers can be helpful for gripping small parts or wires.
- Replacement Flywheel: Ensure you have the correct replacement flywheel for your specific Casablanca fan model.
- Ladder: A sturdy ladder is essential to reach the fan safely.
- Work Gloves: To protect your hands.
- Voltage Tester: To ensure that the power is off.
- Small container: To hold small parts, like screws, so they don’t get lost.
Having the right tools and taking the necessary safety precautions will make the replacement process much smoother and safer.
Step-by-Step Flywheel Replacement
Replacing a Casablanca fan’s flywheel requires a systematic approach. These steps provide a general guide, but always refer to your fan’s specific manual if available, as variations may exist.
- Prepare the Work Area:
- Clear the area beneath the fan to prevent damage to furniture.
- Lay down a drop cloth or protective covering.
- Position your ladder securely and ensure it’s stable.
- Turn Off the Power:
- Go to your home’s circuit breaker box and turn off the breaker that supplies power to the ceiling fan.
- Use a voltage tester to verify that the power is off at the fan’s wiring.
- Disassemble the Fan (Partial):
- You likely won’t need to completely remove the fan.
- Carefully remove the fan blades. This usually involves unscrewing them from the blade holders.
- You may need to remove the fan’s canopy (the housing that covers the ceiling junction box) to access the motor area. Refer to your manual for specific instructions.
- Access the Flywheel:
- The flywheel is typically located above the motor, where the downrod connects.
- You may need to remove a decorative cover or housing to expose the flywheel.
- Remove the Old Flywheel:
- This is where the process can vary most between models.
- Set Screw: Some flywheels are held in place by a set screw. Loosen the set screw with an Allen wrench or screwdriver.
- Nut/Bolt: Other flywheels may be secured with a nut or bolt. Use the appropriate wrench to loosen and remove it.
- Pulling Off: In some cases, the flywheel may simply slide off the motor shaft after removing the fastener.
- Caution: Be careful not to damage the motor shaft during removal. Do not use excessive force.
- Install the New Flywheel:
- Align the new flywheel with the motor shaft.
- Slide it onto the shaft until it’s properly seated.
- Secure the flywheel using the set screw, nut/bolt, or other fastener.
- If using a set screw, tighten it firmly, but don’t overtighten.
- If using a nut or bolt, tighten it to the manufacturer’s recommended torque (if specified).
- Reassemble the Fan:
- Replace any covers or housings you removed.
- Reattach the fan blades securely.
- Ensure all screws and connections are tight.
- Test the Fan:
- Turn the power back on at the circuit breaker.
- Test the fan at various speeds to ensure it’s running smoothly and quietly.
- Check for any wobbling or unusual noises.
- Clean Up:
- Remove your tools and drop cloth.
Important Notes:
- Manual is Key: Always consult your fan’s specific manual for detailed instructions and diagrams.
- Variations: There can be variations in flywheel attachment depending on the Casablanca fan model.
- Motor Shaft: Exercise extreme care not to bend or damage the motor shaft.
- Force: Avoid using excessive force at any point in the process. If something doesn’t come loose easily, double check that you have removed all fasteners.
Troubleshooting and Common Issues
Even with careful attention to the steps, you might encounter some challenges during or after flywheel replacement. Here’s a guide to common issues and how to address them:
- Flywheel Not Fitting:
- Incorrect Part: Double check that the replacement flywheel is the exact match for your fan model. Refer to your fan’s manual or our parts guide.
- Obstruction: Ensure the motor shaft is clean and free of any debris or burrs.
- Force: Do not force the flywheel. If it doesn’t fit easily, recheck compatibility and shaft condition.
- Fan Wobbling After Replacement:
- Flywheel Seating: Make sure the flywheel is properly seated on the motor shaft and securely fastened.
- Blade Balance: Replacing the flywheel can sometimes affect blade balance. Check and rebalance the blades if necessary.
- Other Components: Rule out other causes of wobbling, such as loose blade holders or a damaged downrod.
- Motor Not Running Smoothly:
- Wiring: Double check all wiring connections if you had to disconnect any wires during the process.
- Obstruction: Ensure nothing is obstructing the fan’s rotation.
- Motor Damage: If the motor makes unusual noises or doesn’t run correctly, it may have been damaged. In this case, professional repair or motor replacement is recommended.
- Fastener Issues:
- Stripped Screw: If you strip a screw, use a screw extractor or seek professional help to avoid further damage.
- Lost Fastener: Make sure to use the correct replacement fastener.
Important Reminders:
- Manual: Always consult your fan’s manual for specific troubleshooting advice.
- Professional Help: If you are unsure about any step or encounter significant difficulties, it’s best to consult a qualified electrician or fan repair technician.
- Safety First: If you are not comfortable working with electricity, contact a professional.
Reassembly and Testing
Once you’ve successfully replaced the flywheel, proper reassembly and testing are crucial to ensure your Casablanca fan operates correctly.
- Reassemble the Fan:
- Carefully replace any covers or housings that you removed to access the flywheel.
- Securely reattach the fan blades to the blade holders. Ensure they are tightened properly to prevent wobbling.
- If you disconnected any wiring, double check the connections against your fan’s wiring diagram.
- If you removed the canopy, reattach it to the ceiling mounting bracket.
- Testing Procedure:
- Restore Power: Go back to your circuit breaker box and turn the power back on to the ceiling fan circuit.
- Initial Test: Turn on the fan at the wall switch or use the remote control. Observe the fan closely as it starts.
- Speed Settings: Test the fan at all speed settings (low, medium, high) to ensure it operates smoothly at each speed.
- Direction Check: Verify that the fan rotates in the correct direction.
- Noise and Wobble: Listen for any unusual noises (grinding, clicking) and watch for excessive wobbling. A slight wobble can sometimes be normal, but excessive movement indicates a problem.
- Light Function (If Applicable): If your fan has a light kit, test its operation as well.
- Post-Reassembly Safety Checks:
- Secure Fasteners: Double check that all screws, nuts, and bolts are tightened securely.
- Wiring: If you worked with any wiring, make sure there are no exposed wires and that all connections are secure.
- Stability: Ensure the fan is securely mounted to the ceiling and there is no movement or shaking.
If the fan operates correctly after these tests, you have successfully replaced the flywheel. If you encounter any issues, refer back to the troubleshooting section or seek professional help.
Conclusion
Replacing a Casablanca fan’s flywheel can be a manageable task with the right information and tools. By following these step-by-step instructions and prioritizing safety, you can potentially restore your fan’s smooth operation.
Remember, however, that safety is paramount. If you are not comfortable with any part of the process, it’s always best to consult a qualified professional.
We hope this guide has provided you with the knowledge and confidence to approach this repair. If you have any questions or feedback, please feel free to leave a comment below.